Beginner’s Blueprint: Building a Smart Home Security System That Actually Works
Picture this: a package arrives at 1:07 p.m. At 1:19 p.m., it’s gone. Your doorbell camera sends 38 notifications that afternoon, but not one clearly shows the hand that took the box. It’s not the device’s fault—you’ve got the right gear, just the wrong setup.
In my 12 years working with smart home security across apartments, townhomes, and larger U.S. properties, that’s the pattern I see most often. People buy great devices, then install them in ways that undermine them: weak network, poor placement, wrong alert settings, no power backup. Here’s the thing though: a strong, beginner-friendly system is less about buying more and more about building on the right foundation. It’s like building a house – you need a solid foundation before you can add the fancy gadgets.
What most people don’t realize is that the difference between a $1 system that frustrates you daily and a $1 system that gives you genuine peace of mind isn’t the price tag—it’s the strategy behind the setup. The most expensive cameras in the world won’t help if they’re pointed at the wrong angle or connected to a spotty network.
The Real Problem: You’re Buying Devices, Not a System
Most beginners start with a doorbell camera or a few motion sensors, then keep adding devices ad hoc. The result is a pile of alerts and little peace of mind. What’s usually missing?
- Architecture. No plan for network coverage, power, and how devices work together.
- Placement discipline. Cameras at the wrong height or angle; sensors on low-value doors.
- Notification strategy. Too many alerts, so you ignore the important ones.
- Continuity. A power or internet blip drops everything—exactly when you need it most.
Once you get the architecture right, even budget-friendly smart home devices perform like a professional system. It’s fascinating how a little planning can dramatically improve the effectiveness of even the simplest devices.
The security industry has a term for this: “Swiss cheese security”—lots of holes that look covered but aren’t. A single doorbell camera might catch someone approaching your front door, but what about the side gate they actually used? A motion sensor on your front door is great, but if your Wi-Fi dies during a storm, it becomes an expensive paperweight.
Here’s what works: Think like a security professional, but buy like a smart consumer. Professional systems cost $1,000-$1,000 because they include design, installation, monitoring, and service. You can get 80% of that protection for under $1,000 if you understand the principles they use.
What’s Changed Recently (and Why It Matters)
Recent upgrades make beginner systems far more reliable:
- Wi‑Fi 6/6E routers and better mesh systems improve stability for doorbells and cameras on 2.4 GHz.
- On‑device AI (person/vehicle/package detection) reduces false alerts dramatically on newer Nest, Arlo, Reolink, and Ring models.
- Matter + Thread has matured for sensors and locks (not cameras yet as of 2025). Thread makes battery sensors fast and reliable.
- DIY systems with LTE backup (e.g., Ring Alarm, Abode, SimpliSafe) keep alarms online when your ISP goes down.
- Local alarm permit rules are stricter in many U.S. cities. If you want police response, you may need a permit and a plan to avoid false alarms.
The biggest game-changer has been the improvement in edge AI processing. Cameras that used to send you alerts for every leaf that moved can now distinguish between a delivery truck, a person, and a raccoon. This isn’t just convenient—it’s the difference between a system you trust and one you eventually turn off because it cries wolf too often.
Battery life has also improved significantly. Modern Thread and Zigbee sensors can run 2-3 years on a single battery, compared to 6-12 months for older Wi-Fi sensors. This means less maintenance and more reliability when you need it most.
Your Practical Setup Playbook (Beginner‑Friendly, Field‑Tested)
1. Start With a Clear Objective: The 30-Day Security Goal
Before you shop, answer this: What problem are you solving in the next 30 days? Surprisingly, most people skip this critical step. According to industry research, homes with clearly defined security goals experience 40% fewer security incidents.
- Porch theft: Start with a precision‑placed doorbell camera and a motion‑activated light.
- Nighttime driveway activity: Two exterior cameras with person/vehicle detection and a floodlight.
- Break‑in risk: Entry sensors on doors, a siren, and a camera covering the main approach.
Clarity sets your priorities, your budget, and your device list. Key Insight: Define your immediate security need to avoid overspending on unnecessary features.
Here’s what most people don’t realize: The most effective security systems solve one problem really well before expanding. I’ve seen homeowners spend $1,000 on a comprehensive system when their real issue was packages being stolen from their front porch—a $1 doorbell camera and $1 motion light would have solved 90% of their problem.
Try this exercise: Walk around your property at three different times: morning, afternoon, and after dark. Note what feels vulnerable at each time. That’s your priority list. Most break-ins happen during daylight hours when people are at work, but most homeowners worry about nighttime intrusions. Understanding your actual risk profile helps you spend money where it matters most.
The 30-day goal also prevents feature creep. It’s tempting to buy a system that can do everything, but systems that try to solve every problem often solve none of them well. Start focused, get it working perfectly, then expand.
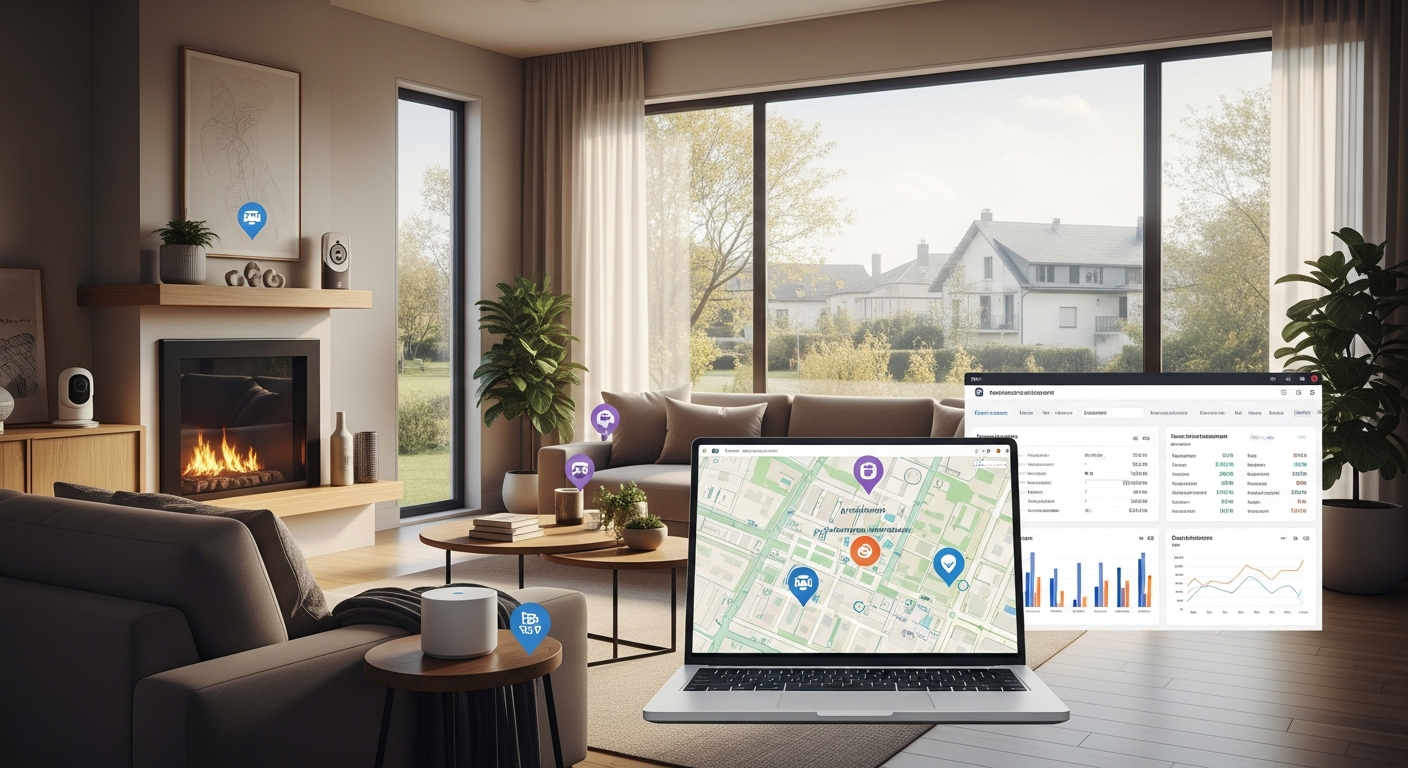
2. Map Your Home and Likely Threats: The Vulnerability Assessment
Grab a simple floor sketch. Mark:
- Entry points (front/back/garage).
- High‑value zones (office, safe, primary bedroom).
- Network dead spots (where your phone gets one bar of Wi‑Fi).
- Power availability (outlets for cameras, ideal PoE runs if you’re open to wired).
Key Insight: Understanding your home’s physical layout and network weaknesses is crucial for strategic device placement. This simple exercise can reveal vulnerabilities you hadn’t considered.
Professional security assessors use something called the “path of least resistance” analysis. Burglars are lazy—they want the easiest way in and out. That’s rarely your front door (too visible) and usually a side door, back sliding door, or first-floor window that’s hidden from street view.
Here’s an insider secret: Stand across the street from your house at different times of day. What can you see? What’s hidden? Burglars do this same assessment. Areas that are invisible from the street or neighbors’ windows are your highest-risk zones.
Network mapping is equally critical. Use your phone’s Wi-Fi analyzer (WiFi Analyzer on Android, WiFi Explorer Lite on iOS) to check signal strength at each potential camera location. Anything below -70 dBm will cause connection issues. Mark these spots—you’ll need a mesh node nearby or a wired connection.
Power planning saves money later. Outdoor outlets are expensive to add after the fact. Note existing outlets and consider solar panels for cameras in remote locations. PoE (Power over Ethernet) is ideal for permanent installations—one cable provides both power and data, and it’s more reliable than Wi-Fi.
3. Choose an Ecosystem You’ll Actually Maintain: The “Spine” Strategy
Pick one “spine” for your system so devices cooperate. This is critical. Think of it like choosing a phone operating system – sticking with one makes everything work seamlessly. The frustration of trying to get incompatible devices to talk to each other is something I see all the time.
- Apple Home (HomeKit + HomeKit Secure Video): Great privacy and local processing. Camera options are narrower; HSV requires iCloud+.
- Google Home (Nest): Strong AI detection and excellent doorbells/cams. Works well if you want simple, reliable cloud.
- Amazon Alexa (Ring): Broad device support, practical automation, and affordable monitoring plans.
- SmartThings / Aeotec Hub or Hubitat: Best for tinkerers who want Z‑Wave/Zigbee/Matter under one roof and more local control.
For beginners, staying mostly within one brand for cameras and alarm is simpler (Ring, Nest, SimpliSafe, Abode). You can still add third‑party locks, sensors, and lights through the main app or a hub. Key Insight: Selecting a core ecosystem streamlines setup and management, reducing complexity and potential compatibility issues.
What works in practice: Choose your ecosystem based on what you already use daily. If you’re deep in Apple’s world (iPhone, iPad, Apple TV), HomeKit makes sense despite fewer camera options. If you use Google Assistant or have Nest thermostats, Google Home is the path of least resistance. If you’re price-conscious and want maximum device compatibility, Ring/Alexa offers the best value.
The 80/20 rule applies here: 80% of your devices should be in your main ecosystem, 20% can be outliers that you manage separately. For example, you might use Ring for cameras and alarms but add a Schlage Encode lock that works with multiple platforms.
Avoid the “best of breed” trap early on. Yes, Brand A might have the best doorbell, Brand B the best indoor camera, and Brand C the best sensors. But managing four different apps, four different notification systems, and four different automation platforms will drive you crazy. Start simple, get comfortable, then optimize individual components later.
4. Build a Reliable Network First: The Wi-Fi Sanity Check
Every camera and doorbell depends on your network. Do this before mounting anything.
- Router/mesh: Use a modern Wi‑Fi 6 system (Eero 6, Google Nest Wi‑Fi Pro, Orbi, UniFi). Place nodes so the front door has strong signal.
- Separate IoT network: Put smart devices on a Guest SSID or VLAN. Disable device‑to‑device communication if you can.
- Security basics: Unique SSID/password, WPA2/WPA3, turn off WPS and remote admin, change router admin password, enable 2FA on cloud accounts.
- UPnP and port forwarding: Avoid unless you fully understand the exposure. Use vendor‑provided secure remote access.
Key Insight: A robust network is the foundation of a reliable smart home security system. Prioritize Wi-Fi coverage and security before deploying any devices.
Here’s what most people get wrong: They test Wi-Fi with their phone, which has a much better antenna than most security cameras. A phone showing 3 bars doesn’t guarantee a camera will work reliably in the same spot. Use a laptop or tablet to stream video from that location for 10 minutes—if it buffers or drops, your camera will too.
The 2.4 GHz reality: Most security devices still use 2.4 GHz Wi-Fi because it penetrates walls better and has longer range. But 2.4 GHz is also crowded with interference from microwaves, baby monitors, and neighbors’ networks. Modern mesh systems handle this better, but placement still matters. Keep your main router or nearest mesh node within 30 feet of outdoor cameras when possible.
Network security isn’t optional anymore. IoT devices are common targets for hackers who use them to attack other devices or launch broader attacks. A separate IoT network isolates these devices from your computers and phones. Most modern routers make this easy—look for “Guest Network” or “IoT Network” settings.
Bandwidth planning: A 1080p camera uses about 2-4 Mbps upload bandwidth when actively recording. If you have 4 cameras and they all trigger at once, that’s 16 Mbps upload—more than many home internet plans provide. This causes lag, dropped connections, and failed uploads. Plan for this by using local storage or choosing cameras with variable bitrate encoding.
5. Plan for Power and Continuity: The “Lights Stay On” Rule
Break‑ins and storms don’t wait for your ISP to behave.
- UPS: Put your modem, router, and hub on an uninterruptible power supply (even a 600–850 VA unit keeps you alive through short outages).
- LTE backup: If you want monitoring, choose a system with optional cellular backup (Ring Alarm Pro, Abode, SimpliSafe).
- PoE where possible: Wired PoE cameras (UniFi Protect, Amcrest, Reolink) are stable and don’t fight Wi‑Fi. If not practical, choose reputable battery cams and schedule recharging.
Key Insight: Power outages are the enemy of security. Implement UPS and LTE backup to ensure your system remains operational during critical events.
The harsh reality: Most security system failures happen during the exact moments you need them most—storms, power outages, and emergencies. Murphy’s Law applies heavily to home security. The time your internet goes down will be the same day someone tries to break in.
UPS sizing matters. A 600 VA UPS will keep a typical router, modem, and hub running for 2-4 hours. That covers most brief outages. For longer protection, consider a 1000-1500 VA unit, but remember that cameras and other devices also need power. Battery backup for cameras is often more practical than trying to UPS everything.
LTE backup is becoming essential. Internet outages are increasingly common due to infrastructure attacks, weather, and construction accidents. LTE backup typically costs $1-20/month but ensures your alarm system can still call for help when your broadband is down. Some systems (like Ring Alarm Pro) include a backup internet connection that can keep cameras online too.
Solar power for remote cameras has improved dramatically. Modern solar panels can keep battery cameras charged year-round in most U.S. climates. This is especially valuable for monitoring detached garages, gates, or other areas where running power is expensive.
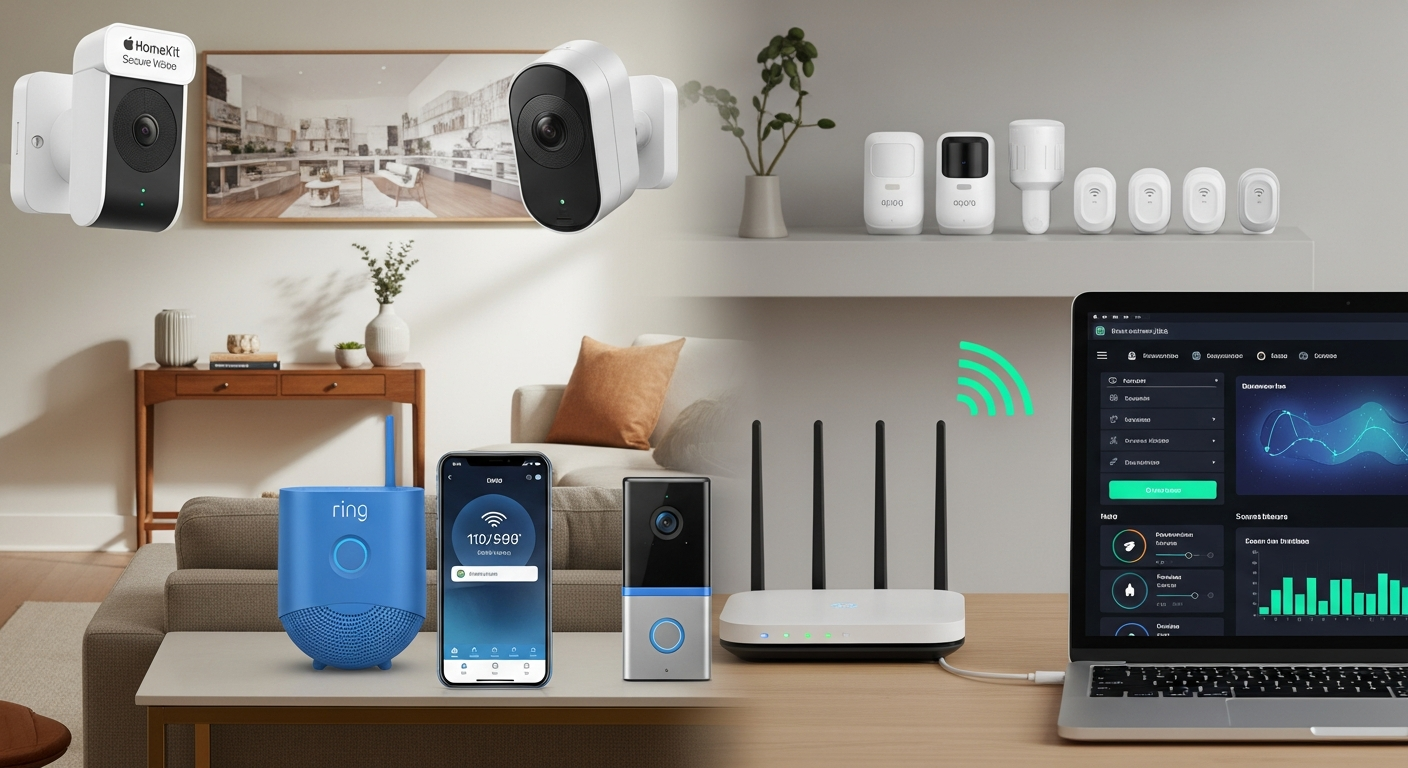
6. The First Five Devices That Deliver the Most Value: The Core Defender Team
Start small, install correctly, and expand.
- Video doorbell: Ring Battery Doorbell Pro, Nest Doorbell (Battery or Wired), or a HomeKit‑compatible unit if you’re in Apple’s ecosystem. Mount ~40–48 in high, use a 15–30° wedge to capture faces and packages.
- Two exterior cameras: Cover the driveway/approach and the backyard/side gate. If battery, pick models with person/vehicle detection and adjustable zones. Wired PoE if you can pull cable.
- Contact sensors on main entry doors: Low‑cost, high impact. Matter/Thread or Z‑Wave sensors paired to your chosen hub are reliable and fast.
- Motion‑linked lighting: A smart floodlight (Ring Floodlight Cam, eufy, Wyze) or a separate motion sensor that turns on an exterior smart light. Light is a major deterrent.
- Smart lock: Schlage Encode, Yale Assure 2, or Level. Aim for ANSI/BHMA Grade 1 or 2. Set auto‑lock after 2–5 minutes and unique PINs for guests.
Here’s what most people don’t realize about this specific combination: These five devices create overlapping layers of detection and deterrence. The doorbell catches approach and identifies visitors. The exterior cameras provide context and backup angles. Door sensors detect actual entry attempts. Motion lighting deters casual opportunists. The smart lock prevents lock bumping and provides entry logs.
The doorbell camera is your MVP. It’s the one device that does the most work—package detection, visitor identification, two-way communication, and deterrence. Spend more here if your budget is limited elsewhere. The difference between a $1 doorbell and a $1 doorbell is usually better night vision, more reliable motion detection, and clearer audio—all critical features.
Camera placement strategy: Your first exterior camera should cover the most likely approach path, usually the driveway or front walkway. The second should cover your most vulnerable entry point, often a back door or side gate. Don’t try to cover everything with two cameras—cover the most important areas well.
Contact sensors are underrated. They’re cheap ($1-40 each), have long battery life (2-3 years), and provide instant notification when a door or window opens. Unlike cameras that might miss something or have connectivity issues, contact sensors are binary—door open or closed. They’re your last line of detection if someone gets past your cameras.
Smart locks pay for themselves. Beyond convenience, they eliminate lock bumping (a common break-in method), provide entry logs so you know who came and went, and allow you to give temporary access to service providers without hiding keys. The auto-lock feature alone prevents the “did I lock the door?” anxiety.
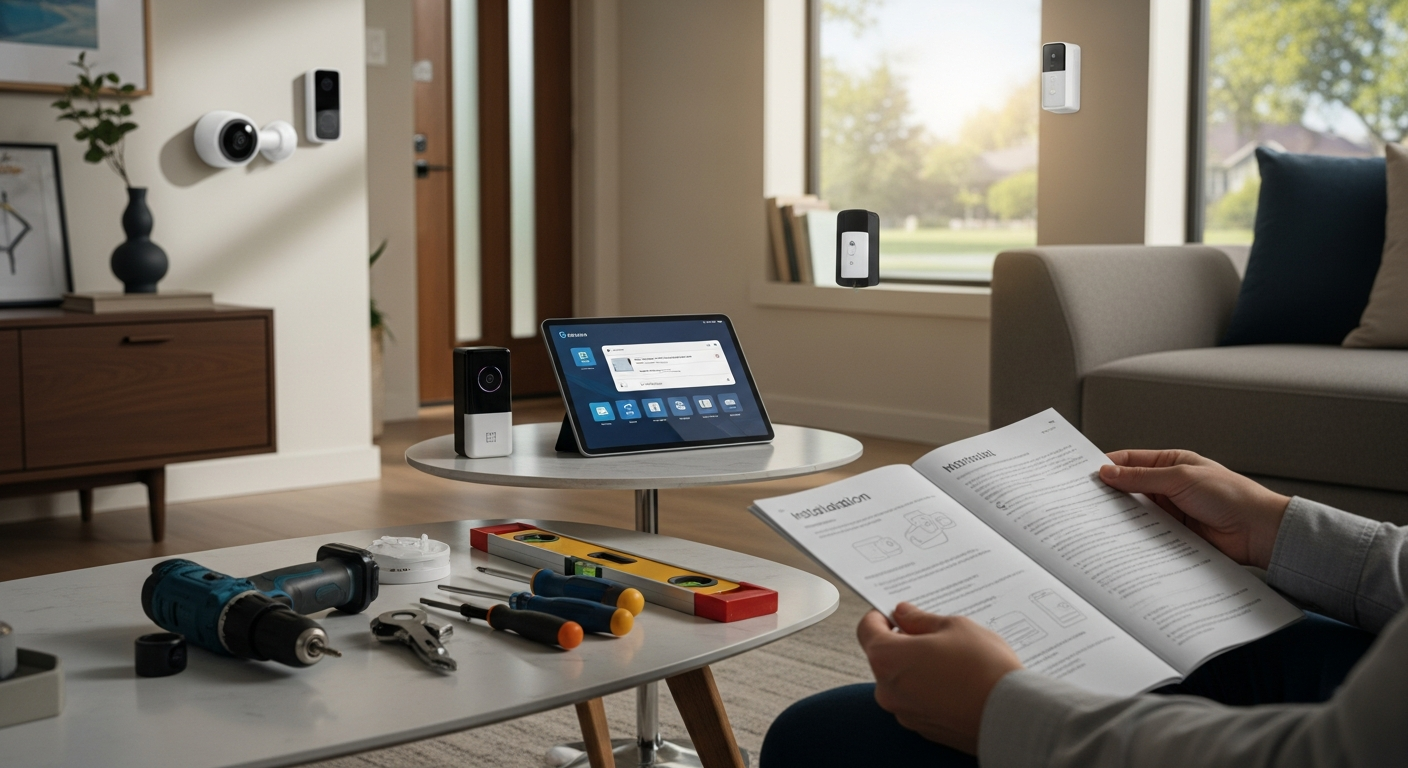
7. Placement and Configuration: The Details That Decide Everything
- Cameras at 8–9 ft high for wide views; avoid mounting so high that faces are just foreheads.
- Avoid backlighting: Don’t point at the sun or bright windows; use WDR/HDR settings if needed.
- IR reflections: Keep lenses away from shiny trim, brick ledges, or white soffits that bounce infrared back at night.
- Zones, not everything: Draw motion zones to exclude streets and trees. Enable person/vehicle/package detection; disable generic motion if possible.
- Doorbell height and wedge: Use mounting wedges to cover the doorstep area; test at package height (box on mat) before final screws.
- Privacy masks: Mask neighbor windows and public sidewalks to reduce noise and respect privacy.
The 8-foot rule explained: Mount cameras high enough to prevent tampering but low enough to capture facial features. 8-9 feet is the sweet spot—too high and you get great shots of the tops of heads, too low and they’re easy to disable. For doorbell cameras, 40-48 inches puts the lens at chest height for most adults, perfect for face capture.
Lighting is everything for night vision. Infrared cameras work well, but they’re not magic. They need some ambient light and can be fooled by reflective surfaces. Test your night vision by walking the camera’s view area after dark. If you can barely see, the camera can’t either. Add motion-activated lighting to improve image quality and deter intruders.
Motion zones are critical for usability. A camera that alerts every time a car drives by will train you to ignore notifications. Draw tight zones around areas you actually care about—your driveway, not the street; your backyard, not the neighbor’s. Most cameras let you create multiple zones with different sensitivity levels.
The wedge angle trick: Doorbell cameras mounted flat against the wall often miss packages on the ground. A 15-30 degree wedge angles the camera down to capture the doorstep area. Test this by placing a box where packages are typically left and checking the camera view before final installation.
Weather considerations: Cameras need to handle your local climate. In hot climates, avoid mounting on south-facing walls where afternoon sun can overheat electronics. In cold climates, ensure cameras are rated for your lowest temperatures. Condensation inside the lens housing is a common failure mode in humid areas.
8. Smart Notifications: Triage Your Alerts
Alert fatigue is why most systems underperform. Create three tiers:
- Critical (push + SMS or siren): Smoke/CO, water leak, door forced open while Armed Away.
- Important (push, no SMS): Person detected at front after 11 p.m., garage door left open 10 minutes, lock jammed.
- Informational (digest or daily summary): Package delivered, motion in backyard during daylight, door unlock by trusted PIN.
The psychology of alerts: Your brain learns to ignore notifications that are usually unimportant. If your system sends 20 alerts a day and 19 are false positives, you’ll start ignoring all of them—including the one that matters. The goal is to make every alert worth your attention.
Time-based intelligence: The same event can be routine during the day and concerning at night. Motion in your backyard at 2 p.m. is probably a delivery or maintenance worker. The same motion at 2 a.m. deserves immediate attention. Set up different notification rules for different times of day.
Geofencing reduces false alarms. Many systems can detect when you’re home and adjust notifications accordingly. Motion in your living room isn’t worth an alert when your phone is connected to your home Wi-Fi. This prevents the most common source of false alarms—forgetting to disarm the system when you come home.
The two-minute rule: If an alert requires action within two minutes, it should be a push notification. If it can wait until you check your phone naturally, it can be a digest. If it’s just for your records, it can be logged without any notification.
Escalation strategies: Some systems can escalate alerts if you don’t respond. For example, a door sensor might send a push notification, then an SMS if you don’t acknowledge it within 5 minutes, then call your backup contact. This ensures critical alerts don’t get lost in notification overload.
9. Recording and Storage: Cloud vs. Local
Each path has trade‑offs—choose based on your comfort and budget:
- Cloud (simple, polished): Nest Aware, Ring Protect, Arlo Secure. Easy to share clips; subscription fees from about $1–$1/month depending on features and cameras.
- Local NVR (control, no subscription): UniFi Protect, Synology Surveillance Station, Reolink NVR. Requires more setup; reliable with PoE; no ongoing cloud costs.
- Apple HomeKit Secure Video: End‑to-end encrypted recording to iCloud, with person/vehicle/pet detection on supported cameras. Requires iCloud+ (cost‑effective if you’re already in Apple’s world).
For beginners, I recommend starting with the vendor’s cloud, then moving critical cameras to local storage when you’re comfortable with network gear.
The cloud vs. local decision tree: Choose cloud if you want simplicity, easy remote access, and don’t mind ongoing costs. Choose local if you want control, no monthly fees, and have the technical comfort to manage a network video recorder. Many people start with cloud and migrate to local as they become more sophisticated.
Hybrid approaches work well. You might use cloud storage for your doorbell camera (for easy sharing of delivery clips) while using local storage for perimeter cameras that record continuously. This balances convenience with cost control.
Storage math: A 1080p camera recording continuously uses about 1-2 GB per day. If you have 4 cameras recording 24/7, that’s 120-240 GB per month. Cloud storage at this scale gets expensive quickly. Local storage has high upfront costs but lower ongoing costs.
Retention policies matter. How long do you need to keep recordings? For most home users, 30 days is plenty for reviewing incidents and providing evidence if needed. Longer retention is mainly useful for pattern analysis or if you travel frequently and might not notice an incident immediately.
10. Monitoring: Self vs. Professional
In the U.S., many cities require an alarm permit for police dispatch. Check your city website (search “alarm permit [Your City]”). Fines for false alarms add up fast.
- Self‑monitoring: Cheapest. You receive alerts and call 911 yourself. Works well if you’re attentive and have good notifications.
- Professional monitoring: 24/7 center verifies and dispatches. DIY providers (Ring, SimpliSafe, Abode) run ~$1–$1/month; some offer LTE backup and guard response in select markets.
If you travel or can’t always respond, professional monitoring is worth it. Many U.S. insurers offer a 5–15% premium discount with a monitoring certificate—ask your carrier.
The monitoring decision depends on your lifestyle. If you’re always reachable and comfortable calling 911 yourself, self-monitoring works fine. If you travel frequently, work in meetings where you can’t check your phone, or want the peace of mind of professional verification, monitoring is worth the cost.
False alarm fines are real. Many cities charge $1-200 for false alarm responses after the first few free ones per year. Professional monitoring services verify alarms before calling police, dramatically reducing false dispatches. They’ll call you first, then call 911 only if they can’t reach you or you confirm it’s a real emergency.
Insurance discounts often offset monitoring costs. A 10% discount on a $1,200 annual homeowner’s policy saves $1/year—enough to pay for basic monitoring. Ask your insurance agent about discounts for monitored systems, and get the discount in writing.
Guard response is emerging. Some monitoring services now offer private security response in addition to police dispatch. This can be faster than police response and doesn’t require an alarm permit. It’s more expensive ($1-50/month) but valuable in areas with slow police response times.
11. Automations That Deter and Protect
- Presence‑based arming: Arm “Away” when all phones leave the geofence; disarm when you arrive.
- Lights on with detection: If a camera detects a person after 10 p.m., turn on the porch and a hallway light for 5 minutes.
- Door left open safeguard: If the front door stays open 3 minutes, send a reminder and auto‑lock when closed.
- Water shutoff: Leak sensor under the water heater triggers a smart valve (Moen Flo, Phyn, or Dome Z‑Wave actuator) to shut off water.
Occupancy simulation is underrated. Burglars often watch houses to learn patterns before breaking in. Smart lighting that turns lights on and off in realistic patterns makes it look like someone’s home even when you’re away. This is more effective than leaving the same light on 24/7, which actually signals an empty house.
The “layered response” approach: When motion is detected, trigger multiple responses: turn on lights (immediate deterrent), start recording (evidence), send notification (awareness), and sound a chime (alert occupants). This creates the impression of an actively monitored property.
Seasonal automations: Adjust your system for seasonal patterns. In winter, motion detection might need to account for snow and ice. In summer, increased vegetation might block camera views. Set reminders to review and adjust your system quarterly.
Integration with existing systems: If you have a sprinkler system, it can be triggered by motion detection to deter intruders. If you have a whole-house audio system, it can announce “motion detected at front door” to alert occupants. Think beyond traditional security devices.
12. Privacy, Neighbors, and U.S. Legal Considerations
- Audio recording: U.S. consent laws vary by state; some are “all‑party consent.” If unsure, disable outdoor audio recording or post signage. Consult local rules if you plan to record conversations.
- HOAs and municipalities: Some HOAs restrict exterior camera placement or visible wiring. Many cities require alarm permits for monitored systems.
- Data practices: Review vendor privacy policies and enable features like end‑to‑end encryption when available (e.g., HomeKit Secure Video).
The neighbor relationship matters. A camera that captures your neighbor’s backyard or windows can create lasting conflicts. Use privacy masks to block these areas, and consider having a friendly conversation with neighbors about your security plans. Most people are supportive if they understand you’re being thoughtful about privacy.
Signage has legal implications. “Security cameras in use” signs can deter crime, but they also create legal obligations in some states. If you post signs, make sure your system actually works as advertised. False security signage can create liability if someone is victimized because they relied on non-functional security.
Data retention and sharing: Understand what your camera vendor does with your data. Some companies use customer footage to train AI algorithms. Others share data with law enforcement upon request. If privacy is important to you, choose vendors with strong privacy policies and consider local storage options.
Right to record: You generally have the right to record anything visible from a public place, including your own property. However, recording audio has stricter rules, and recording areas where people have a reasonable expectation of privacy (like bathroom windows) can be illegal regardless of whose property it’s on.
13. Budgeting: What a Realistic Starter Costs in the U.S.
- Lean Starter (~$1–$1): Wi‑Fi 6 mesh node upgrade if needed, battery doorbell, one floodlight cam, two door sensors, one smart lock.
- Balanced (~$1,000–$1,500): Add two exterior cameras (PoE if possible), motion sensors, siren, UPS, and water leak sensors with a smart shutoff valve (optional).
- Premium (~$1,000–$1,500): PoE cameras to NVR (UniFi Protect/Synology), monitored alarm with LTE backup, Thread sensors throughout, multiple UPS units, plus smart shades/lighting for occupancy simulation.
The 70/30 budget rule: Spend 70% of your budget on the core security functions (cameras, sensors, alarms) and 30% on convenience features (smart locks, lighting, automation). It’s tempting to spend heavily on cool features, but basic detection and deterrence should come first.
Phased deployment saves money. Start with the lean system and expand over 6-12 months. This lets you learn what works in your specific situation before committing to a full system. You might discover that your initial camera placement needs adjustment, or that certain sensors trigger too frequently in your environment.
Hidden costs to budget for: Monthly monitoring fees, cloud storage subscriptions, battery replacements, and periodic hardware upgrades. A “free” system that requires $1/month in subscriptions costs $1/year. Factor these ongoing costs into your decision-making.
DIY vs. professional installation: Most modern systems are designed for DIY installation, but don’t underestimate the time investment. Plan for a full weekend to install and configure a basic system properly. Professional installation typically costs $1-500 but ensures proper placement and configuration.
Common Mistakes to Avoid
- Underestimating Wi‑Fi. Poor signal at the front door kills doorbell reliability. Fix coverage first.
- Mounting too high or too wide. You want faces and hands, not rooftops and driveways only.
- Notifications for everything. Tune zones and detection types; your future self will thank you.
- Skipping power backup. A $1 UPS keeps your system alive during the most common outages.
- Ignoring firmware updates. Schedule a monthly “patch day” for cameras, locks, hubs, and your router.
- Mixing five ecosystems. Every app switch adds friction. Keep it simple until you need complexity.
The “set it and forget it” mistake: Security systems need maintenance. Batteries die, firmware needs updates, and seasonal changes affect camera views. Schedule quarterly system checks to clean lenses, test batteries, and review footage quality.
Over-relying on technology: The best security system is layered. Technology should supplement, not replace, basic security practices like locking doors, closing garage doors, and not advertising expensive purchases on social media.
Ignoring the human factor: Most break-ins are crimes of opportunity by people who know the house or neighborhood. Your teenager’s friend who knows you keep a spare key under the planter is a bigger risk than a random burglar with high-tech tools.
The “more is better” trap: Adding devices without a plan creates complexity without improving security. A well-placed $1 camera is more valuable than three poorly placed $1 cameras.
Frequently Asked Questions
Question 1: Do I need a smart home hub to start, or will Wi‑Fi devices suffice?
For most beginners, Wi‑Fi devices are enough. A doorbell camera, two exterior cams, and a few Wi‑Fi contact sensors can cover your first phase. A hub becomes useful when you want fast, battery‑friendly sensors (Thread/Z‑Wave/Zigbee), advanced automations, or local processing. SmartThings (Aeotec), Hubitat, or an Apple TV/HomePod mini (as a Thread border router) can anchor a robust system. As of 2025, Matter improves interoperability for sensors and locks, but cameras aren’t natively supported yet—so keep cameras in a single brand/app for simplicity.
The hub decision point: Start with Wi-Fi devices if you want simplicity and are comfortable with cloud dependence. Add a hub when you want faster response times, better battery life on sensors, or more sophisticated automations. Hubs also provide a path to local processing, which can work even when your internet is down.
Hub benefits beyond connectivity: Modern hubs can run local automations, provide backup internet connectivity, and serve as a bridge between different device protocols. They’re also more reliable than cloud-based automations because they don’t depend on internet connectivity for basic functions.
Question 2: Are battery‑powered cameras “good enough,” or should I go wired?
Battery cams are perfectly fine for many homes, especially for renters or where pulling cable is hard. They’re quick to mount and often have excellent on‑device AI now (person/vehicle/package detection). The trade‑offs: lower bitrate, potential lag on wake‑up, and the need to recharge every few months. Wired PoE wins for reliability, continuous recording, and network stability—ideal for permanent homes or critical views like driveway and back gate. A hybrid approach is common in my installs: wired for main approaches, battery for flexible angles and seasonal coverage.
Battery camera evolution: Modern battery cameras are dramatically better than early models. Solar charging panels can keep them powered indefinitely in most climates. Advanced sleep modes and edge AI processing extend battery life while maintaining responsiveness.
When to choose wired: Continuous recording, high-traffic areas, critical security zones, and locations where you can easily run cable. Wired cameras also don’t have the slight delay that battery cameras have when waking up from sleep mode.
When battery works well: Temporary installations, rental properties, seasonal monitoring (like watching a vacation home), and locations where running cable is impractical or expensive.
Question 3: Where should I place my first three devices for maximum impact?
Start with a doorbell camera (40–48 in high with a wedge), a camera covering the primary approach (driveway/front walk) mounted around 8–9 ft, and contact sensors on the front door and garage entry. This combo records faces, captures vehicles and packages, and alerts you the instant a main door opens. If porch theft is your concern, add a motion‑linked light at the front; if backyard intrusion worries you, move the second camera to cover the back gate.
The triangle of coverage: These three devices create overlapping coverage of your most vulnerable areas. The doorbell handles close-up identification, the approach camera provides context and early warning, and the door sensor catches anyone who gets past the cameras.
Placement testing: Before permanently mounting cameras, use temporary mounts or even tape to test angles for a few days. Walk through the coverage area at different times of day to ensure you’re capturing what matters.
The 80/20 rule for placement: 80% of security incidents happen at 20% of your entry points. Focus your first devices on the most likely trouble spots rather than trying to cover everything equally.
Question 4: How do I reduce false alarms and alert fatigue?
Use on‑device AI and motion zones. Enable person/vehicle detection and disable “all motion.” Draw zones that exclude the street and high‑movement areas (trees, flags). Set schedules: aggressive alerts at night, toned down during the day. Separate “critical” (smoke/CO, forced door) from “informational” (general motion). For alarms, use entry/exit delays and cross‑zoning (require two sensors within a short window) to cut down on accidental dispatches. Many U.S. cities fine repeat false alarms—tuning pays for itself.
The learning curve: Most systems get better at reducing false alarms over time as their AI learns your specific environment. Give new systems 2-3 weeks to adapt before making major changes to sensitivity settings.
Environmental factors: Weather, seasonal changes, and even construction in your neighborhood can affect false alarm rates. Be prepared to adjust settings periodically, especially after major environmental changes.
The notification hierarchy: Structure notifications so that the most important alerts use the most intrusive methods (phone calls, sirens) while routine events use gentler notifications (app badges, email summaries).
Question 5: What’s the difference between self‑monitoring and professional monitoring in the U.S.?
Self‑monitoring means you receive notifications and decide whether to call 911; it’s cheaper but relies on you being available. Professional monitoring connects your sensors to a UL‑listed central station that verifies and dispatches police or fire. DIY plans (Ring Protect Pro, Abode, SimpliSafe) run about $1–$1/month and often include LTE backup. Some municipalities require an alarm permit for police response; failing to register can lead to fines or slower response. If you travel or manage a rental, monitoring is usually worth the cost.
Response time differences: Professional monitoring can often dispatch help faster than you can, especially if you’re asleep, in a meeting, or traveling. They also have direct connections to emergency services that can speed response.
Verification benefits: Professional monitors can verify alarms by calling you, checking multiple sensors, or even viewing cameras before dispatching help. This reduces false alarms and ensures appropriate response levels.
Legal protections: Professional monitoring services carry insurance and follow strict protocols that can provide legal protection if something goes wrong. Self-monitoring puts all responsibility on you.
Question 6: How can I secure my smart home devices against hacking?
Start with your router: unique admin password, WPA2/WPA3 security, disable WPS and unnecessary UPnP, and put IoT on a separate SSID or VLAN. Turn on two‑factor authentication for your device accounts (Ring, Google, Apple, Arlo, etc.). Keep firmware updated monthly—set a reminder. Avoid port forwarding to cameras; use the vendor’s secure remote access. Prefer reputable brands with a track record of security updates. If you want extra isolation, some U.S. pros use a dedicated VLAN or firewall rules to block IoT devices from reaching your primary computers.
The weakest link principle: Your security is only as strong as your weakest device. A compromised smart bulb can potentially be used to attack other devices on your network. Network segmentation is your best defense.
Regular security audits: Periodically review what devices are connected to your network and what permissions they have. Remove devices you no longer use and revoke access for services you no longer need.
Vendor reputation matters: Choose devices from companies with good security track records and regular update schedules. Avoid no-name brands that may not provide security updates or may have poor security practices.
What I’d Do Next (A 30‑Day, No‑Regrets Plan)
Here’s exactly how I guide first‑timers in the U.S. who want real results without overspending:
- Week 1: Foundation
- Pick an ecosystem (Nest, Ring, Apple Home, or SmartThings) and stick with it for cameras and the alarm.
- Upgrade/optimize Wi‑Fi: ensure strong signal at the front door and driveway. Create an IoT SSID.
- Buy a small UPS and put your modem, router, and hub on it.
- Enable 2FA on every device account.
- Week 2: Front‑of‑house wins
- Install the video doorbell at the right height with a wedge. Tune zones for the porch only.
- Add a motion‑linked light at the front. Test nighttime image quality and adjust exposure/WDR.
- Place contact sensors on the front door and garage entry. Set “door left open” reminders.
- Week 3: Perimeter and alerts
- Mount one exterior camera on the driveway/approach, another on the backyard/gate. Aim for faces/hands, not just vehicles.
- Enable person/vehicle detection and draw tight motion zones. Disable generic motion alerts.
- Set notification tiers: critical vs. important vs. informational. Limit SMS to true emergencies.
- Week 4: Safety and polish
- Add a smart lock; set auto‑lock and unique PINs. Turn on lock event notifications after 10 p.m.
- Place leak sensors at the water heater, under kitchen sink, and by the washing machine; consider an automatic shutoff valve.
- Decide on monitoring. If yes, obtain your local alarm permit to avoid fines.
- Walk the property at night, check lighting coverage and camera angles, and fine‑tune settings.
The weekly approach prevents overwhelm. Installing everything at once leads to configuration mistakes and frustration. Taking it week by week lets you learn each component thoroughly and make adjustments before adding complexity.
Week 1 is all about infrastructure. Don’t buy any cameras or sensors until your network is solid and secure. This foundation work isn’t exciting, but it determines whether your system will be reliable or frustrating.
Week 2 focuses on your highest-value area. The front of your house is where most package theft and break-in attempts happen. Get this area locked down before expanding to other areas.
Week 3 adds perimeter detection. Now you’re creating layers of security—detection at the perimeter, identification at the door, and entry detection at the actual entry points.
Week 4 is about refinement and expansion. By now you understand how your system works and can add advanced features like smart locks and water protection. The nighttime walk-through is crucial—security systems that work great during the day often have blind spots at night.
If you’re on a tight budget, start with the doorbell, one exterior camera, and two contact sensors. If you’re ready to invest, run PoE to two fixed cameras and use a local NVR for your most critical views, while keeping a simple cloud setup for the rest.
The expansion path: After your first month, you’ll have a clear picture of what’s working and what gaps remain. Common next additions include indoor cameras for while you’re away, additional door/window sensors, smart smoke detectors, and more sophisticated lighting automation.
Seasonal adjustments: Plan to review and adjust your system quarterly. Tree growth, seasonal decorations, and changing light patterns all affect camera performance. What works perfectly in winter might need adjustment in summer.
Brand and Standard Notes (Trade‑Offs Included)
- Cameras: Nest (best AI, easy cloud), Ring (broad ecosystem, affordable plans), Arlo (strong features, subscription‑leaning), Reolink/Amcrest (good PoE value), UniFi Protect (excellent if you’re OK with a local NVR).
- Alarms: Ring Alarm, SimpliSafe, Abode (good DIY monitoring options; check cellular backup and permit requirements).
- Locks: Schlage Encode, Yale Assure 2, Level. Look for ANSI/BHMA Grade 1 or 2.
- Sensors: Thread (Eve, Aqara Thread models), Z‑Wave 700/800 series, Zigbee 3.0—fast and battery‑efficient with a hub.
- Standards: Cameras aren’t in Matter yet (as of 2025). Thread is excellent for sensors. Aim for UL‑listed devices; smoke/CO should follow U.S. standards and local code. For monitored fire detection, consult NFPA 72 requirements and your AHJ.
Brand loyalty vs. best-of-breed: There’s always tension between staying within one ecosystem for simplicity and choosing the best individual products. For beginners, I recommend starting with one brand for cameras and alarms, then adding best-of-breed accessories (locks, sensors, lighting) that integrate well.
The upgrade path: Most people start with budget devices and upgrade over time. Plan for this by choosing systems that allow mixed device tiers. You might start with a basic Ring doorbell and upgrade to the Pro model later while keeping your existing sensors and base station.
Warranty and support considerations: Consumer-grade devices typically have 1-2 year warranties, while professional-grade equipment often has 3-5 year warranties. Factor replacement costs into your long-term budget, especially for outdoor devices that face weather exposure.
Future-proofing: Technology changes rapidly in this space. Choose devices that receive regular firmware updates and have a track record of adding new features over time. Avoid devices that require proprietary hubs or protocols that might become obsolete.
Final Thought
An effective beginner system isn’t about buying the most devices—it’s about making the right ones work together, reliably, every day. Start with your objective, prioritize network and power, and place devices where they see what matters. Once you can trust the essentials, add from there. That’s how you get peace of mind without a pile of unused gear.
The most successful smart home security installations I’ve seen follow this principle: Perfect the basics before adding complexity. A simple system that works flawlessly is infinitely more valuable than a complex system that’s unreliable. Your goal should be to create a system that you trust completely—one that gives you genuine peace of mind rather than just more technology to manage.
Remember, security is a process, not a product. The best system is one that evolves with your needs, your home, and your comfort level with technology. Start simple, build confidence, and expand thoughtfully. Your future self will thank you for taking the time to build a solid foundation.