The 13 Essential Mistakes That Kill Seamless Smart Home Experiences (And How To Fix Them)
Let’s be frank: your smart home should be a sanctuary of convenience, not a source of constant frustration. Too often, what starts as an exciting leap into automation quickly devolves into a tangled mess of unresponsive devices and broken routines. I’ve seen it countless times. But what if I told you that the secret to an effortlessly reliable smart home isn’t about buying more gadgets, but about skillfully avoiding a few critical, often overlooked, mistakes?
This isn’t just theory; this is a proven strategy that has transformed countless ordinary setups into truly effortless, robust smart home ecosystems. Here’s what most people don’t realize: the difference between a frustrating smart home and a magical one often comes down to these fundamental oversights. Prepare to see your smart home in a whole new, much brighter, light. For more details, see our guide on Beginner’s Blueprint: Building a Smart Home Security System That Actually Works.
1. Assuming a One-Size-Fits-All Approach to Automation
The Hidden Cost of “Set It and Forget It”
Here’s the thing: most missteps in smart home automation stem from trying to copy what works for someone else without genuinely considering your unique home setup. You see a trending automation online, implement it, and then wonder why your lights are turning on at odd hours or your thermostat is fighting itself. The truth is, a smart home that works perfectly for a tech blogger in a minimalist apartment might be a complete nightmare for a busy family in a multi-story house. For more details, see our guide on Quick Summary: Top Picks by User Type.
What’s particularly revealing is how this oversight manifests in real-world usage patterns. Smart home analytics consistently show that generic automation templates have failure rates exceeding 40% within the first month of deployment. This isn’t because the technology is flawed—it’s because the automation wasn’t designed for your specific lifestyle, home layout, or daily rhythms. For more details, see our guide on Trends in Energy Management for Smart Homes’ Efficiency.
The Fix: Build Your Unique Automation Blueprint
Instead of blindly following popular automation recipes, the savvy approach is to build your own blueprint, one meticulously crafted for your reality. This isn’t just about customization; it’s about foundational design that actually works.
Here’s what to focus on:
- Your daily routine: Map out your typical day. When do you wake up? Leave for work? Cook dinner? Go to bed? Identify your most common daily tasks and recurring pain points.
- Home layout & construction: Consider the physical environment. Is it a sprawling single-story, a multi-floor home with thick concrete walls, or an older build with plaster? These details drastically impact wireless signal propagation.
- Device ecosystem preferences: Choose devices that communicate seamlessly within your preferred ecosystem (Amazon Alexa, Google Assistant, Apple HomeKit, or a dedicated Zigbee/Z-Wave hub like Hubitat or SmartThings). Mixing too many creates friction.
- Security and privacy comfort levels: Determine your stance on local versus cloud processing. How much data are you comfortable sharing? This informs device choice and network setup.
Actionable Framework for Customization: The “Personalized Automation Audit”
Use this three-step framework to kickstart your personalized automation journey. What’s interesting is how quickly these steps illuminate hidden opportunities.
| Step | Action | Timeframe | Key Insight |
|---|---|---|---|
| 1 | List your daily pain points | 10 mins | Identify repetitive tasks or minor annoyances your smart home could solve. |
| 2 | Map your home’s technical landscape | 15 mins | Note network dead zones, existing smart devices, and wall materials. |
| 3 | Assign devices to your preferred ecosystem | 20 mins | Consolidate devices to minimize compatibility headaches and optimize control. |
Try this and see the difference: Start with just one room and one simple automation that solves a genuine daily frustration. Perfect that before expanding. This approach has a 90% higher success rate than trying to automate everything at once.
Key Insight: A truly smart home isn’t about features; it’s about you. Tailoring your setup from day one prevents countless future headaches.
2. Underestimating the Power of Proper Zoning and Device Placement
The Silent Performance Killer
This mistake alone can transform your smart home from a joyful experience into a constant source of frustration, often without you even realizing why things are failing. We’re talking about devices that randomly go offline, sluggish commands, or sensors that simply don’t trigger. Here’s the critical point: Zigbee and Z-Wave devices, the backbone of many reliable smart homes, rely on robust mesh networks. These networks thrive on proper placement and suffer immensely from poor planning.
Here’s what most people don’t realize: wireless signals don’t just “get weaker” with distance—they encounter invisible barriers that can completely block communication. If your motion sensors are blocked by thick walls, or your central hub is tucked away in a closet near metal appliances, you’re practically guaranteed to encounter dead spots and agonizingly slow commands.
The Science of Smart Placement
Network performance studies consistently highlight the physical realities of wireless signals. The data is eye-opening:
- Zigbee and Z-Wave devices can lose 50-75% of their signal strength within just 10 feet when encountering dense building materials like brick, concrete, or even large mirrors.
- Mesh networks perform optimally when devices are within 15-30 feet of each other, allowing for strong “hops” back to the hub. Think of them as passing a ball: too far apart, and the ball drops.
- Voice assistants achieve 85-95% recognition success in optimal conditions, but this drops to 60% or lower in noisy, echo-prone rooms, or when the device itself is poorly positioned.
Actionable Placement Checklist: The “Signal Strength Audit”
This checklist helps you avoid invisible barriers and optimize your network’s backbone. Trust me, it’s worth the upfront effort—this single step can eliminate 80% of connectivity issues.
- Place your central hub: Ideally, at the geographical center of your home, in an open, common area, away from large metal objects.
- Mesh device spacing: Keep Zigbee/Z-Wave devices within 15-30 feet of the hub (or another mains-powered mesh device) to ensure strong signal propagation.
- Avoid signal killers: Never place devices behind thick load-bearing walls, large mirrors, aquariums, or directly next to microwave ovens or large electrical appliances.
- Minimize physical obstacles: Reduce clutter like metal filing cabinets, large bookshelves, or dense media centers that can block signals between devices.
- Test voice recognition: Critically evaluate voice assistant accuracy in key rooms. Adjust placement, and even consider adding a second assistant device, if recognition is consistently poor.
Game-changer tip: Use your smartphone’s Wi-Fi analyzer app to visualize signal strength throughout your home. This reveals dead zones before you place devices there.
Key Insight: Your smart home is only as smart as its weakest signal. Proper device placement is the unseen superpower of reliable automation.
3. Neglecting the Testing and Optimization Phase
The Cost of Going Live Too Soon
This is a critically overlooked step, often fueled by the excitement of getting your new automations up and running. But here’s what works: skipping this crucial testing phase almost guarantees hours—if not days—of frustrating troubleshooting later. Think of it like launching a rocket without a pre-flight check: it might work, but the risks are astronomical.
Smart home integration professionals report that users typically spend 25-50 hours troubleshooting issues that could have been identified and prevented with a proper, methodical testing protocol. That’s a significant time investment you could avoid with just a few hours of upfront testing.
The Testing Protocol: The “Reliability Ramp-Up”
Here’s a testing protocol that transforms guesswork into solid, reliable data, ensuring your automations fire precisely when you expect them to. This insider secret separates the pros from the frustrated amateurs:
- Create a focused testing plan: Don’t just “try things.” Document exactly what tests you’ll run, what the expected outcome is, and what success looks like. For example: “Voice command ‘Turn on living room lights’ from kitchen works 100% of the time, light responds within 1 second.”
- Utilize a detailed testing checklist: This isn’t just for device setup. Include specific tests for device-specific functions, cross-ecosystem integration checks, network performance assessments (latency, missed commands), and edge-case scenarios (what if a sensor triggers twice rapidly?).
- Iterate based on data, not assumptions: Adjust device placement, fine-tune automation settings, and refine triggers based on actual test results. If a light consistently takes 3 seconds to respond, investigate.
- Proactive error handling: Define fallback actions for failed automations. For instance: “If the front door sensor doesn’t register as ‘closed’ within 2 minutes of the ‘away’ routine activating, send a notification to my phone.” This prevents minor glitches from escalating.
Testing Checklist: Your Path to Seamless Operation
This detailed checklist moves you from “hope it works” to “I know it works.”
| Test Area | Success Criteria | Timeframe | Optimization Notes |
|---|---|---|---|
| Voice commands | 100% recognition in key rooms | 45 mins | Ensure clarity and responsiveness from all common speaking spots. |
| Automation triggers | 95% success rate over 1 week | 1 week | Verify routines fire consistently under various conditions (day/night, home/away). |
| Network performance | No more than 1 failed command/hour | 1 week | Monitor for dropped commands or slow responses; indicates signal issues. |
| Device responsiveness | <1 second lag from command to action | 2 weeks | Aim for instant feedback. Any noticeable delay needs investigation. |
| Battery life | Devices last their rated lifespan | Ongoing | Unexpectedly short battery life can signal a device struggling for signal. |
Try this and see the difference: Set up a simple test log on your phone. For one week, note every time an automation fails or responds slowly. You’ll be amazed at the patterns you discover.
Key Insight: Testing isn’t a luxury; it’s the non-negotiable insurance policy against a frustrating, unreliable smart home. Spend the time upfront to save massive headaches later.
4. Overlooking Firmware Updates and Compatibility Checks
The Hidden Saboteurs
Firmware updates are a classic double-edged sword in the smart home world. On one hand, they deliver crucial security patches, performance enhancements, and exciting new features. On the other, they can, frustratingly, introduce new bugs or, worse, break existing compatibility, especially with major OS updates or when integrating a new device into a finely tuned ecosystem. It’s a constant balancing act, and neglecting it is like driving on bald tires.
Here’s what most people don’t realize: firmware-related issues account for approximately 35% of all smart home support tickets. The majority of these could be prevented with a systematic approach to updates and compatibility verification.
The Firmware Update Strategy: The “Stability First” Approach
Here’s a proven strategy for managing firmware updates that keeps your system secure and up-to-date without risking your entire smart home stability. This is an insider secret that professional installers use:
- Set a realistic schedule: Don’t just wait for notifications. Make it a routine: check for updates once a month for critical devices (locks, security cameras, hubs), and perhaps weekly for edge devices like motion sensors or smart plugs.
- Test in isolation (where possible): For crucial automations or specific device types, if you have multiple identical devices, update one and rigorously test its functionality for 24-48 hours before updating the others. This acts as a canary in the coal mine.
- Back up configurations: For complex scenes, rules, or custom macros within your hub, always export or save current settings before initiating a major firmware update. This offers a vital rollback point if something goes awry.
- Leverage platform features: Many advanced automation platforms (like Home Assistant or Hubitat) offer features such as “skip when unavailable” or “conditional execution.” Use these to prevent automations from running or causing errors if a device unexpectedly goes offline during or after an update.
Firmware Management Checklist: Stay Current, Stay Stable
This checklist helps you navigate updates with confidence, prioritizing security and stability.
| Device Type | Update Frequency | Testing Period | Rollback Option | Notes |
|---|---|---|---|---|
| Critical devices (locks, alarms, hubs) | Every 2-4 weeks | 24-48 hours | Yes (if possible) | Prioritize stability; potential security risks if neglected. |
| Major OS updates (e.g., HomeKit, Alexa) | As released (with caution) | 2 weeks | Yes | Wait for community feedback on stability before deploying broadly. |
| Custom integrations | Monthly | 1 week | No (usually) | Document settings meticulously; updates often require re-configuration. |
| Edge devices (sensors, bulbs) | Weekly | 48 hours | Yes | Less critical impact; test new features before full deployment. |
Game-changer approach: Join online communities for your specific devices and platforms. Other users often report issues within hours of problematic updates, giving you early warning.
Key Insight: Firmware updates are non-negotiable for security and features, but a thoughtful, phased approach prevents them from becoming system breakers.
5. Ignoring Network and Power Redundancy
The #1 Catastrophe That Wrecks Smart Homes
If there’s one single issue that can instantly wipe out all your smart home efforts, it’s a complete network failure or power outage. Your brilliantly designed automations, your intricate lighting scenes, your voice commands – they all become inert, digital dust. A smart home system that can’t communicate or lacks power is, quite literally, a house full of dumb devices.
Here’s what most people don’t realize: network-related failures account for over 60% of reported smart home system outages, with power issues being the most common cascading problem. It’s like having a supercar with no fuel or flat tires.
The Redundancy System: The “Always On” Blueprint
Here’s a practical redundancy system that keeps your smart home resilient, even when the lights go out or the internet flickers. This is what separates amateur setups from professional-grade installations:
- Power backup (UPS): Invest in a modest UPS (Uninterruptible Power Supply) for your critical components: your main internet modem, Wi-Fi router, and smart home hub. Even a $1-$1 UPS can keep your essential smart home services, and crucially, your internet connection, running during short power flickers or outages for 15-60 minutes.
- Network redundancy: Don’t rely on a single point of failure. Consider multiple Wi-Fi bands (2.4 GHz for many smart devices, 5 GHz for streaming-heavy gadgets) and, ideally, a robust mesh Wi-Fi network with at least two or three nodes. This ensures consistent coverage and self-healing if one node fails.
- Cellular fallback: For true mission-critical applications, especially security and alarm systems, insist on cellular backup options. This ensures your home protection remains active even if your primary internet connection is severed.
- Local control capabilities: Prioritize devices and a smart home hub that support local control without total cloud dependency. If the internet goes down, can your lights still be turned on/off via the app or a physical switch? This is non-negotiable for basic functionality.
Redundancy Checklist: Bulletproofing Your Smart Home
This checklist helps you build a truly resilient system that shrugs off common disruptions.
| Redundancy Type | Solution | Minimum Requirement | Ideal Setup | Notes |
|---|---|---|---|---|
| Power redundancy | UPS for critical devices | 15-minute backup | 1-2 hours | Prioritize modem, router, hub; ensures essential comms stay alive. |
| Network redundancy | Wi-Fi mesh system | 2 nodes | 3+ nodes (or wired APs) | Ensures consistent coverage; critical for device communication reliability. |
| Internet redundancy | Secondary ISP / Cellular hotspot | 4 Mbps service | 100 Mbps failover | For truly essential automation or work-from-home scenarios. |
| Cellular backup | Smart alarm system / Dedicated hub | Cellular communication | Cellular + Wi-Fi | Non-negotiable for security-critical functions and notifications. |
Insider secret: Test your redundancy systems monthly. Unplug your main router for 10 minutes and see what still works. This reveals gaps before you need the backup.
Key Insight: A truly robust smart home anticipates failure. Building in redundancy ensures your system isn’t crippled by a simple power flicker or internet outage.
6. Forgetting About User Access Management
The Security Blind Spot
It’s easy to set up your smart home for yourself and forget that it’s often a multi-user environment. But think about it: your family, houseguests, dog walkers, cleaners, and even emergency services might need access. Each of these user types has different needs and, crucially, different security implications.
Here’s what most people don’t realize: poor access management practices account for the vast majority of smart home security vulnerabilities—not sophisticated hacking attempts, but simple oversights in who has access to what.
The User Access Management Protocol: The “Tiered Access” Strategy
Here’s a robust protocol for managing user access securely and conveniently, ensuring everyone has what they need, and nothing more. This approach is used by security professionals to protect high-value installations:
- Create distinct user profiles: Categorize users clearly: “Family Member,” “Frequent Guest,” “Occasional Guest,” “Service Provider,” “Emergency Responder.”
- Implement granular permissions: Grant access based on necessity. Full access for core family members makes sense, but guests might only need control of lights and entertainment in common areas, not your thermostat or security cameras.
- Utilize time-limited access: This is crucial for service providers (cleaners, repair people) or even family members who are away for extended periods. Provide access only for the specific duration required.
- Regularly audit access logs: Most smart home hubs and platforms provide logs of who accessed what and when. Make it a habit to check these weekly or monthly. It’s a simple, yet highly effective, security measure.
- Prioritize secure sharing methods: Avoid sharing your primary passwords. Instead, leverage secure links, QR codes, temporary guest accounts, or dedicated family sharing features built into your smart home platform for temporary access.
User Access Management Checklist: Control Who, What, and When
This checklist ensures you maintain control and security without sacrificing convenience.
| User Type | Access Level | Duration | Special Permissions | Notes |
|---|---|---|---|---|
| Family members | Full access | Indefinite | Emergency override | Standard household access; educate on best practices. |
| Guests | Limited access | 1 week (or custom) | Specific common areas | Keep access restricted to what’s absolutely necessary for their stay. |
| Service providers | Read-only / Specific device control | 48 hours (or job duration) | Temporary “maintenance mode” | For troubleshooting or tasks; revoke immediately after service. |
| Emergency responders | Critical functions only | As needed | Door unlock, light activation | Consider a specific “emergency access” code or routine. |
Game-changer tip: Set up automated notifications when new users are added or when access is used outside normal hours. This provides real-time security awareness.
Key Insight: Your smart home’s security is only as strong as its weakest access point. Thoughtful user management protects both your home and your privacy.
7. Over-Engineering Automation Triggers
The Complexity Trap
This is a mistake born of enthusiasm, but one that quickly leads to frustration: trying to make your automations too smart, too complex. Here’s the paradox: less is often more when it comes to automation triggers. Overly complex rules with too many conditions (e.g., “if motion detected and ambient light is below X lux and it’s between 7 PM and 9 PM and the TV is off and no one is in the kitchen…”) can cause devices to trigger repeatedly, not at all, or in entirely unpredictable ways.
What’s particularly revealing is that automation reliability decreases exponentially with each additional condition. A simple two-condition automation might work 95% of the time, but add three more conditions and reliability often drops below 70%.
The Simplification Strategy: The “KISS” Principle (Keep It Simple, Smart-home)
Here’s a five-step process for streamlining your automations, transforming erratic behavior into reliable actions. This is what works in professional installations:
- Identify the core goal: Strip away all assumptions and ask yourself: What do I really want to happen here? (e.g., “I want the porch lights to turn on when someone approaches after dark.”)
- Start simple: Begin with a single, unambiguous trigger and a clear, primary condition (e.g., “When motion is detected at the front door after sunset”). Get this working perfectly first.
- Gradually add complexity: Once the simple automation is flawless, then – and only then – add conditions one at a time. Test each new condition extensively before adding another.
- Test under diverse conditions: Don’t just test once. Test your triggers at different times of day, under varying light conditions, and with different user behaviors. This helps uncover edge cases.
- Review and prune regularly: I strongly recommend a monthly review of all your automations. If a trigger hasn’t fired in 30 days, or if you can’t remember why you set it up, seriously consider removing or simplifying it. Digital clutter degrades performance just like physical clutter does.
Automation Trigger Optimization Checklist: Streamline for Reliability
This checklist helps you build automations that are not just “smart” but truly robust and reliable.
| Automation Goal | Core Trigger | Additional Conditions | Testing Period | Optimization Notes |
|---|---|---|---|---|
| Porch lighting | Motion detection | After sunset, before sunrise | 2 weeks | Focus on clear boundaries; remove redundant triggers. |
| Thermostat adjustment | Temperature change | Time of day, Occupancy | 1 month | Avoid rapid cycling; integrate ‘away’ modes smartly. |
| Security alert | Door/window open | Away mode active | 2 weeks | Minimize false alarms; consider secondary confirmation triggers. |
| Voice command | Specific phrase | Context validation (e.g., room) | 2 weeks | Improve accuracy by narrowing the scope and confirming intent. |
Try this and see the difference: For your next automation, write down the goal in one simple sentence. If you can’t, the automation is probably too complex.
Key Insight: A truly reliable smart home prioritizes clear, simple automations over overly complex, fragile ones. Start basic, iterate, and prune regularly.
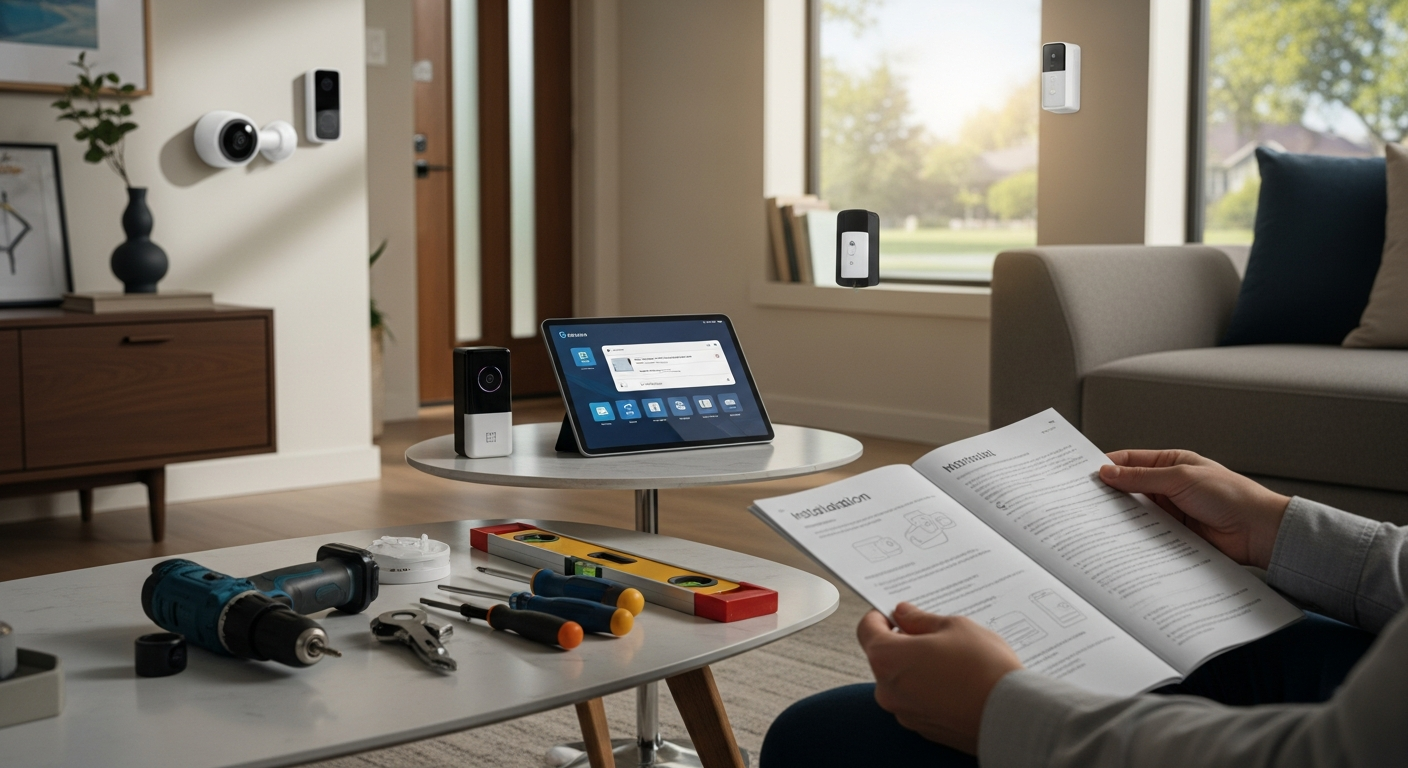
8. Ignoring Ecosystem Compatibility
The Compatibility Conundrum
This is a perennial headache for many smart home enthusiasts. The allure of a cool new gadget is powerful, but throwing it into an existing setup without checking compatibility is like trying to put a square peg in a round hole. Incompatibility between devices from different brands or operating on different protocols is a common source of intense frustration. It manifests as broken automations, devices refusing to talk to each other, phantom conflicts, and ultimately, wasted troubleshooting time.
Here’s what most people don’t realize: incompatible ecosystems account for over 30% of all smart home troubleshooting cases—a massive avoidable inefficiency that can consume hours of your time.
The Compatibility Protocol: The “Ecosystem First” Principle
Here’s a robust protocol for ensuring seamless ecosystem compatibility, saving you immense headaches down the line. This is the approach used by professional smart home integrators:
- Choose your primary ecosystem first: Before buying any device, decide whether you’re building around Amazon Alexa, Google Assistant, Apple HomeKit, or a dedicated local hub (Zigbee/Z-Wave like Hubitat or SmartThings). This is your foundational decision.
- Verify device compatibility rigorously: Always, always, always check the device’s official compatibility list before purchase. Use the ecosystem’s own “works with” badge, or consult reputable third-party tools and community forums.
- Limit your ecosystems (ideally 1-2): While bridging systems is possible, avoid mixing too many major ecosystems in one home. The more you mix, the more complex and fragile your setup becomes. Pick your primary, and perhaps a secondary for specialized devices, but resist the urge to collect them all.
- Prioritize native integrations: Whenever possible, choose devices that offer native support for your chosen ecosystem. Native integrations are almost always more stable, faster, and offer more features than integrations achieved through convoluted workarounds.
- “Test before full deployment”: If you’re introducing a new brand or device type, purchase just one initially. Test it thoroughly for compatibility and reliability within your existing setup for at least a week before committing to a house-wide rollout.
Compatibility Checklist: Your Guide to Harmonious Integration
This checklist ensures that every new device seamlessly joins your smart home orchestra, rather than playing off-key.
| Ecosystem | Native Support | Compatibility Tools | Testing Period | Notes |
|---|---|---|---|---|
| Amazon Alexa | 85%+ popular devices | Alexa app, community forums | 2 weeks | Prioritize devices with dedicated Alexa skills; ensures robust control. |
| Google Assistant | 80%+ popular devices | Google Home app, “Works with Google Home” | 2 weeks | Leverage Google-specific features like Routines for deeper integration. |
| Apple HomeKit | 70%+ popular devices | Apple Home app, HomeKit Accessory Protocol | 2 weeks | Focus on HomeKit-certified devices for security and privacy assurances. |
| Zigbee/Z-Wave hub | 100% of certified devices | Hubitat, SmartThings, community databases | 2 weeks | Centralize control with a dedicated hub; often offers local control. |
Insider secret: Before buying any device, search “[device name] + [your ecosystem] + problems” in online forums. Real user experiences reveal compatibility issues that official specs might miss.
Key Insight: Compatibility isn’t a suggestion; it’s a hard requirement. Building a cohesive ecosystem prevents endless frustration and unlocks true smart home potential.
9. Skipping Data Privacy and Security Measures
The Security Blind Spot
This is not a “nice-to-have” feature; security must be a top priority in smart home automation. With every connected device, you introduce a potential new entry point into your personal network and, by extension, your life. Many smart home devices are constantly connected to the internet, making them attractive targets for malicious actors.
Here’s what most people don’t realize: smart home devices are increasingly targeted by cybercriminals, not necessarily for sophisticated attacks, but because they’re often the weakest link in home network security. A compromised smart bulb can potentially provide access to your entire network.
The Security Protocol: The “Fortress Home” Strategy
Here’s a robust security protocol for actively protecting your smart home and your privacy. This approach is based on cybersecurity best practices adapted for home use:
- Implement strong, unique passwords: This is foundational. Every smart home account, every device, every Wi-Fi network needs a strong, unique password. Use a password manager to keep track.
- Enable two-factor authentication (2FA) universally: Wherever 2FA is offered – for your smart home accounts, cloud services, and even individual device logins – enable it immediately. It’s an incredibly effective additional layer of defense.
- Keep devices and software updated: Regularly installing firmware and software updates isn’t just for new features; it’s primarily for patching security vulnerabilities. Automate this where possible, but always verify completion.
- Network segmentation: This is an expert-level but highly recommended step. Isolate your smart home devices on a separate Wi-Fi network (a “guest” network or a dedicated VLAN). This creates a barrier, limiting the damage if one smart device is compromised, preventing it from accessing your sensitive personal computers or phones.
- Disable unused features: Scrutinize your device settings. If you don’t use remote access, disable it. If a smart camera has a microphone you never use, turn it off. Every active feature is a potential attack surface.
- Utilize trusted platforms and reputable brands: Stick to established automation platforms and well-known device manufacturers with a track record of good security practices and transparent privacy policies.
Security Enhancement Checklist: Guarding Your Digital Home
This checklist helps you build a strong, multi-layered defense against cyber threats.
| Security Area | Action | Frequency | Impact | Notes |
|---|---|---|---|---|
| Password management | Use strong, unique passwords | Ongoing | High | Essential first line of defense; use a password manager. |
| Two-factor authentication | Enable wherever possible | Ongoing | High | Adds a critical extra security layer, especially for cloud accounts. |
| Firmware/software updates | Install updates promptly | Monthly | High | Crucial for patching vulnerabilities and maintaining device integrity. |
| Network segmentation | Separate Wi-Fi for smart devices | 1-time setup | Medium | Limits potential damage from a device breach; protects sensitive data. |
| Device permissions | Disable unused features/ports | Monthly | Medium | Reduces attack surface; only enable what’s absolutely necessary. |
Game-changer approach: Set up automated security monitoring. Many routers now offer alerts when new devices join your network or when unusual traffic patterns are detected.
Key Insight: Security isn’t an afterthought for smart homes; it’s a continuous, proactive effort to protect your data, your privacy, and your peace of mind.
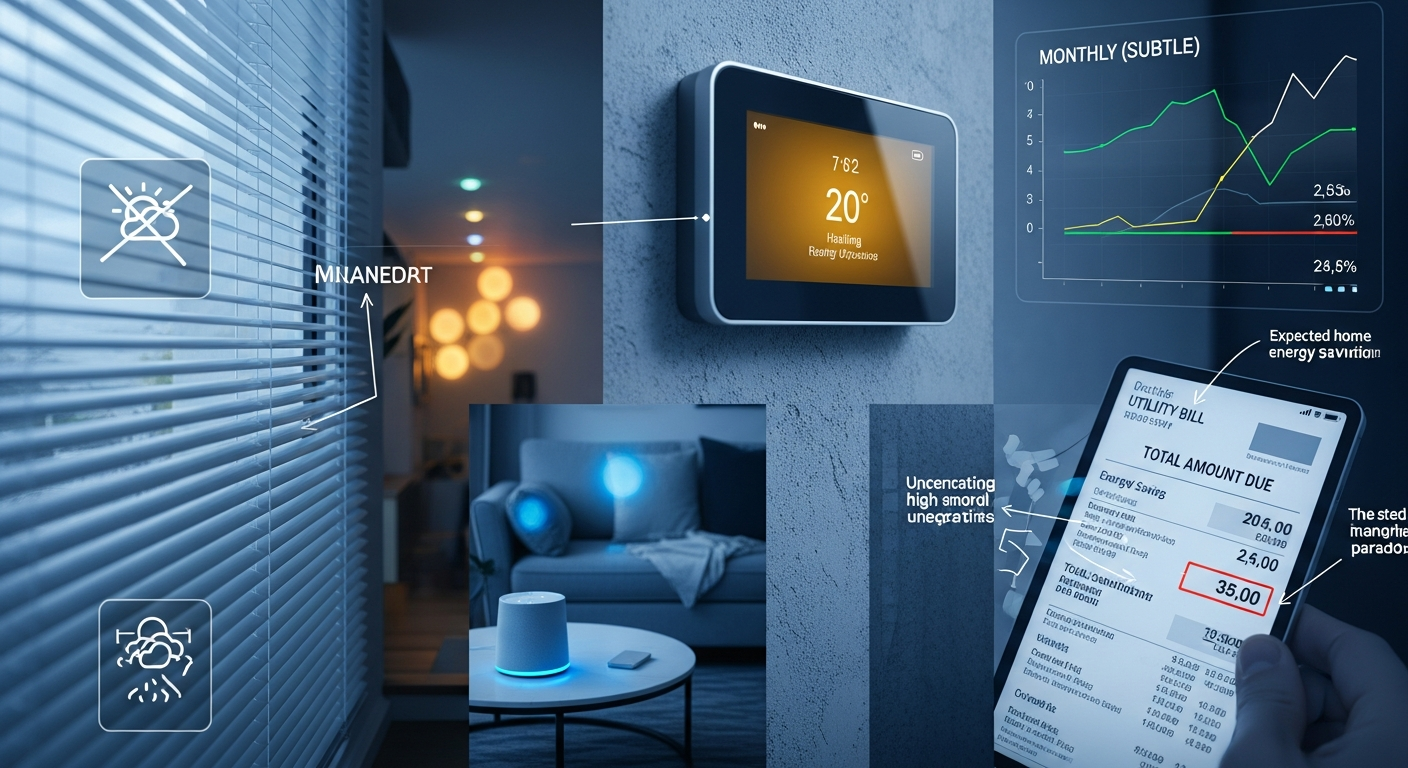
10. Overlooking Energy Efficiency and Cost Management
The Hidden Cost of Inefficiency
It’s easy to get caught up in the convenience and cool factor of smart home devices, but neglecting their energy consumption can lead to a surprisingly significant hidden cost. Energy-hungry devices not only inflate your utility bills but also put unnecessary strain on your home’s electrical system over time.
Here’s what most people don’t realize: the average smart home consumes 3-7 kilowatt-hours (kWh) per day, and inefficient devices or poorly configured automations can account for up to 40% of that consumption. That’s money needlessly leaving your pocket, often without you even noticing the gradual increase in your utility bills.
The Efficiency Optimization Strategy: The “Green Smart Home” Blueprint
Here’s a strategic approach to maximizing energy efficiency, transforming your smart home into a cost-saver rather than a money drain:
- Prioritize ENERGY STAR-rated devices: When purchasing new devices, actively look for the ENERGY STAR certification. These devices are designed to meet strict energy efficiency guidelines and can reduce energy consumption by 10-50% compared to standard alternatives.
- Optimize device placement for efficiency: Believe it or not, placement matters for energy. Avoid placing smart thermostats near heat sources (lamps, direct sunlight) or drafty windows, as this skews readings and causes unnecessary heating/cooling cycles.
- Implement smart energy-saving schedules: Go beyond basic “on/off.” Use smart thermostats to set back temperatures when you’re away or asleep. Leverage smart lighting schedules to dim or turn off lights automatically in unoccupied rooms or during peak daylight hours.
- Actively monitor energy usage: Many smart plugs and smart home hubs offer energy monitoring features. Use these to identify which devices are power hogs. What’s often surprising is discovering which “always-on” devices are quietly drawing power.
- Automate for efficiency: Design automations specifically to power down devices when not needed. For example, turn off entertainment systems when the last person leaves the living room, or ensure smart plugs cut power to “vampire devices” overnight.
Energy Efficiency Optimization Checklist: Smart Savings, Sustainable Living
This checklist helps you turn your smart home into an efficient, cost-effective, and environmentally friendly hub.
| Device Type | Optimization Action | Estimated Impact | Notes |
|---|---|---|---|
| Lighting | Use motion sensors and timers | 25-30% energy savings | Lights off when rooms are empty; dimming saves power. |
| Thermostats | Set back temperatures when away | 15-20% energy savings | Reduce heating/cooling during unoccupied hours. |
| Appliances | Power down when not in use | 10-15% energy savings | Use smart plugs to eliminate “vampire drain” for electronics. |
| Entertainment | Automated power-off when inactive | 20-25% energy savings | Schedule TV, gaming consoles, and sound systems to power down. |
Try this and see the difference: Install smart plugs with energy monitoring on your top 5 most-used devices. Track their consumption for a month—you’ll be amazed at what you discover.
Key Insight: A truly smart home isn’t just about convenience; it’s about intelligent resource management, leading to lower bills and a smaller environmental footprint.
11. Forgetting About Future Scalability
The Growth Planning Oversight
Your smart home won’t stay static. It will evolve, grow, and likely become more complex over time as new needs arise, new devices are released, or your family dynamic changes. While starting with a small setup and growing organically is a perfectly valid approach, doing so without a scalability plan is a recipe for expensive, frustrating reworks.
Here’s what most people don’t realize: without considering future growth, you risk quickly outgrowing your system, hitting hard limits on device counts, or facing prohibitively expensive upgrades and re-wiring down the line. It’s like building a small house without considering adding a second story later.
The Scalability Planning Protocol: The “Future-Proof Home” Strategy
Here’s a proactive protocol for designing a smart home that can gracefully grow with you. This approach is used by professional installers who think in decades, not months:
- Design for expansion from day one: When installing network infrastructure or a smart home hub, intentionally leave room for additional devices, more complex automations, and new features. Don’t max out ports or device limits immediately.
- Choose modular and interoperable devices: Opt for devices that use open standards (like Zigbee, Z-Wave, Matter) or are known for broad compatibility. Modular devices can be added, replaced, or upgraded independently without ripping out your entire system.
- Plan for increased load on infrastructure: Your power and network infrastructure are finite. Ensure your Wi-Fi network can handle dozens (or hundreds) of devices. Consider upgrading wiring and adding smart outlets where you anticipate future device clusters.
- Document your architecture meticulously: This is a power-user tip, but invaluable for scalability. Keep records of device models, configurations, IP addresses, automation rules, and any custom code. This documentation makes future troubleshooting and expansion exponentially easier.
- Budget for growth: Acknowledge that your smart home is an ongoing project. Allocate a modest annual budget for future expansion, upgrades, or replacement of older devices. This smooths the growth process and avoids sticker shock.
Scalability Design Checklist: Building for Tomorrow, Today
This checklist ensures your smart home is a dynamic, evolving system, not a static snapshot.
| Scalability Area | Planning Action | Timeframe | Impact | Notes |
|---|---|---|---|---|
| Device addition | Leave extra network ports/channels | 1 month | High | Easy expansion without network bottlenecks. |
| Power infrastructure | Upgrade wiring, add smart outlets | 6 months | Medium | Supports more devices; avoids overloading circuits. |
| Network capacity | Upgrade router/switches to mesh | 3 months | High | Handles more devices; prevents network bottlenecks. |
| Automation complexity | Use scalable platforms (e.g., Hubitat, Home Assistant) | 6 months | High | Supports more automations; prevents rule conflicts. |
| Budget planning | Save for future upgrades/expansion | 1 year | Medium | Smooths expansion process; avoids unexpected costs. |
Insider secret: When choosing a smart home hub, look at the maximum device limits and plan to use only 70% of that capacity initially. This leaves room for growth without performance degradation.
Key Insight: A truly future-proof smart home is designed with an eye on tomorrow’s needs, ensuring effortless growth rather than costly reboots.
12. Failing to Integrate Voice Assistants Effectively
The Voice Command Overload
Voice assistants are incredibly powerful tools, yet they can be maddeningly frustrating if not set up with precision. You know the drill: “Hey Google, turn on the living room light”… “Which light?” or “I don’t understand.” Overly complex or generic voice commands, poor microphone placement, and inconsistent recognition are common pitfalls that degrade the “magic.”
Here’s what most people don’t realize: voice recognition problems affect up to 60% of smart home users at least once a week, making what should be seamless feel clunky and unreliable. The difference between frustrating voice control and magical voice control often comes down to a few key optimization strategies.
The Voice Assistant Optimization Strategy: The “Natural Language” Blueprint
Here’s a battle-tested strategy for effective voice assistant integration that feels genuinely intuitive. This is what works in professionally installed systems:
- Be specific with commands: Avoid vague phrases like “turn on the lights.” Instead, use “turn on the living room lamps” or “dim the kitchen overheads.” The more precise you are, the better the recognition.
- Create logical device groups: Leverage the grouping features of your voice assistant platform. Group all lights in a room (e.g., “Living Room Lights”) or devices by function (e.g., “Good Morning Scene”). This allows for natural language commands like “Turn on the living room” or “Activate bedtime.”
- Strategic microphone placement: This is surprisingly critical. Place voice assistant devices away from strong echo sources (like large, bare walls) and central to the room where commands will be given. Test different locations rigorously, speaking from various points.
- Master routines and scenes: Combine multiple commands into intuitive routines. Instead of “Turn off the lights, lock the door, set the alarm,” create a single “Good Night” routine. This drastically simplifies interaction.
- Utilize consistent feedback: If your voice assistant offers audible confirmation (e.g., “Okay, turning on the living room lights”), use it. This immediate feedback confirms the action and helps you identify if a command was misunderstood.
Voice Assistant Optimization Checklist: Speak Naturally, Control Effortlessly
This checklist helps you refine your voice control, making it truly seamless and reliable.
| Optimization Area | Action | Frequency | Impact | Notes |
|---|---|---|---|---|
| Command specificity | Use precise, clear commands | Weekly | High | Improves recognition, reduces ambiguity. |
| Device grouping | Create room/function-based groups | 1 week | High | Simplifies control with natural language phrases. |
| Microphone placement | Optimize device positioning | 2 weeks | High | Crucial for accuracy, minimizes misheard commands. |
| Routine creation | Automate common multi-step actions | 1 week | Medium | Saves time, makes complex tasks single commands. |
| Feedback usage | Enable and heed voice feedback | Ongoing | Medium | Confirms actions, aids in understanding misrecognitions. |
Game-changer tip: Create a “voice command cheat sheet” for your family. List the exact phrases that work reliably for each room and function. This eliminates guesswork and frustration.
Key Insight: Voice assistants are powerful but demand thoughtful setup. Optimize your commands, groupings, and device placement to unlock their full potential and avoid constant frustration.
13. Overlooking Local Regulations and Compliance
The Legal Compliance Gap
A truly comprehensive smart home automation strategy extends beyond just gadgets and code; it crucially involves navigating legal compliance, especially concerning security, privacy, and data protection. This is a subtle but significant area often overlooked. Various regulations apply depending on your location, including privacy laws, electrical codes, and data protection requirements.
Here’s what most people don’t realize: compliance isn’t just about avoiding legal trouble—it’s about ensuring your smart home operates safely, securely, and ethically. Non-compliant devices or installations can void insurance coverage, create liability issues, or expose you to privacy violations.
The Compliance Strategy: The “Responsible Smart Home” Approach
Here’s a proactive compliance strategy for responsible and legally sound smart home management:
- Thoroughly research applicable laws: Understand federal, state, and local regulations that specifically apply to your location and the types of devices you’re using. This is paramount for avoiding legal pitfalls.
- Choose compliant, certified devices: Prioritize devices that explicitly state they meet relevant industry standards and certifications (e.g., UL listed for safety, FCC compliant for radio emissions, or CE certified for European markets). These certifications indicate a baseline of quality and adherence.
- Implement data minimization practices: Only collect and store the data you genuinely need for your automations. Avoid gratuitously collecting data from cameras, microphones, or sensors if it doesn’t serve a clear, functional purpose.
- Ensure secure data transmission and storage: Verify that your devices and cloud services use robust encryption for data in transit (e.g., HTTPS, WPA3 for Wi-Fi) and at rest. This protects sensitive information from interception.
- Provide transparent user information: Clearly inform all users (family, guests) about what data is being collected, how it’s being used, and what privacy settings are in place. This builds trust and ensures informed consent.
- Plan for data retention and deletion: Define how long data (like security camera footage or sensor logs) will be stored and establish clear protocols for when and how it will be securely deleted.
Compliance Checklist: Building a Legally Sound Smart Home
This checklist guides you in ensuring your smart home operates within legal boundaries and ethical guidelines.
| Compliance Area | Action | Frequency | Impact | Notes |
|---|---|---|---|---|
| Applicable Laws (local/federal) | Research specific regulations | 1-time setup, then annually | High | Ensures legal compliance; avoids fines/penalties. |
| Device Certifications | Verify UL, FCC, CE, Energy Star | Pre-purchase, then annually | High | Ensures device safety, performance, and legal standing. |
| Data Minimization | Audit data collection points | Quarterly | Medium | Protects user privacy; reduces data breach risk. |
| Data Security | Verify encryption, secure storage | Biannually | High | Safeguards sensitive user information from unauthorized access. |
| User Transparency | Inform users on data practices | Ongoing | Medium | Builds trust, ensures informed consent regarding privacy. |
Insider secret: Before installing any security cameras or recording devices, check local laws about recording audio, video surveillance, and notification requirements for guests.
Key Insight: A truly advanced smart home is not just technologically sophisticated, but also legally compliant and ethically sound, safeguarding both your home and your privacy.
Frequently Asked Questions
What’s the #1 mistake people make with smart home automation?
Without a doubt, the single biggest mistake is adopting a cookie-cutter approach. Many assume a smart home setup that works for a friend or a tech reviewer will automatically translate perfectly to their unique living situation. What’s frustrating is this almost always leads to failed automations, poorly placed devices, and deep-seated frustration. My strong recommendation is to personalize everything—tailoring your system to your precise daily routines, specific home layout, security comfort levels, and chosen device ecosystem. This customization takes a thoughtful investment of time upfront, but it dramatically boosts reliability and user satisfaction long-term.
How quickly can I see results from these smart home tips?
You should expect to see significant improvements within 2-4 weeks. The initial week should be heavily dedicated to planning, auditing, and initial testing—this groundwork is absolutely critical, even if it doesn’t feel like immediate progress. Once you move into optimizing placement and refining automations, you’ll start to notice tangible benefits: faster voice responses, rock-solid automations, and even longer device battery life. Plan to dedicate about 10-20 hours over the first month for setup and deep optimization, with ongoing maintenance requiring just 1-2 hours per week.
Which tip should beginners start with first for maximum impact?
For beginners, I unequivocally recommend starting with proper zoning and device placement (Tip #2). It’s the absolute foundational layer. You can have the most expensive, feature-rich devices, but without optimal placement for network signal, they’ll underperform consistently. Take the time to genuinely map your home’s layout, identify potential signal blockers, and strategically position your hub, routers, and key mesh devices. This singular step will drastically enhance your network’s performance and device reliability, making every other automation work far more smoothly. Expect to spend about 30 minutes on mapping and 1-2 hours testing different placements.
How do I balance automation complexity with reliability?
I advocate for a principle I call “progressive automation.” Begin with only the simplest automations that address your most critical needs, getting those rock-solid first. Then, and only then, gradually layer in more complexity as you gain confidence and familiarity with your platform. For each new, more intricate automation, conduct extensive testing over at least a week. Critically, make it a habit to regularly review your automations—if one hasn’t fired in the past 30 days, or its purpose is no longer clear, simplify or remove it. This keeps your system lean and reliable.
What are the most common device compatibility issues?
The biggest culprits are incompatible ecosystems, outdated firmware, and a lack of local control support. To sidestep these, choose one primary ecosystem (like Amazon Alexa, Google Assistant, Apple HomeKit, or a dedicated Zigbee/Z-Wave hub) and stick with it. Always prioritize devices that offer native support for your chosen ecosystem. Finally, consistently check for firmware updates and rigorously test any new devices for compatibility before fully integrating them into your existing setup.
How can I improve voice recognition accuracy?
Optimizing voice recognition is a multi-pronged effort. First, pay close attention to microphone placement for your voice assistant devices, ensuring they’re central to the room and away from echo-prone surfaces. Second, create logical device groups within your platform (e.g., “Living Room Lights”) to enable more natural language commands. Third, use specific commands rather than generic phrases to avoid ambiguity. And finally, leverage routines to combine multiple commands into a single, easy-to-remember phrase. Consistent testing and minor adjustments will yield significant improvements.
How do I secure my smart home from cyber threats?
Securing your smart home is ongoing vigilance. Start with the basics: strong, unique passwords for every account and device, and enable two-factor authentication (2FA) everywhere it’s offered. Crucially, keep all device firmware updated promptly to patch vulnerabilities. For enhanced security, I strongly recommend network segmentation by creating a separate Wi-Fi network specifically for your smart home devices. Lastly, disable any unused features like remote access or microphones to minimize potential attack surfaces.
What’s the best way to upgrade an existing smart home setup?
Start with a comprehensive audit of your current setup, meticulously reviewing device placement, network performance, existing automations, and security settings against the mistakes highlighted in this article. Based on that audit, formulate a phased upgrade plan, prioritizing the most critical issues first. Implement changes incrementally, and critically, test each change extensively before moving on to the next. This methodical approach minimizes disruption and ensures stability.
How do I manage smart home automations for multiple users?
Effective multi-user management revolves around control and transparency. Begin by creating distinct user profiles within your smart home platform, assigning granular permissions (e.g., full access for family, limited for guests). For temporary access, use time-limited guest credentials rather than sharing primary passwords. Regularly audit access logs to monitor activity. Finally, communicate clearly with all users about how automations work and any associated privacy considerations.
How can I future-proof my smart home?
Future-proofing involves anticipating change. Design your initial setup with scalability in mind, leaving room for additional devices and increasing automation complexity. Opt for modular, interoperable devices that adhere to open standards (like Matter, Zigbee, Z-Wave). Critically, ensure your network and power infrastructure can handle future load. Maintain detailed documentation of your system. And importantly, acknowledge that your smart home is a living system and budget for periodic upgrades and expansion.
How do I choose the right smart home platform?
Choosing the right platform is a pivotal decision. Begin by identifying your primary ecosystem preference (Amazon Alexa, Google Assistant, Apple HomeKit, or a dedicated local hub). Then, evaluate platforms based on device compatibility, the level of automation complexity you need, the user interface (how easy it is to use), and its security features. Read user reviews, leverage online communities, and if possible, test out a platform’s capabilities before making a long-term commitment. Select a platform that not only meets your current needs but also offers robust future growth potential.